Sanding Before Painting: Why This Prep Step Makes or Breaks the Finish
Key Features
- Better Paint Adhesion: Sanding helps paint bond to the surface instead of sitting on top of old gloss, dust, grime, or uneven texture.
- Smoother Final Finish: Proper sanding reduces bumps, ridges, brush marks, patch edges, and rough spots that paint can highlight.
- Longer-Lasting Paint Jobs: Good sanding helps reduce peeling, cracking, flaking, bubbling, and premature coating failure.
- Different Surfaces Need Different Grits: Wood, drywall, metal, trim, cabinets, and exterior siding all require different sanding methods.
- Prep Matters More Than Paint Brand: Premium paint over a poorly sanded surface can still fail. Paint is only as good as the surface underneath it.
- Professional Results Start Before Painting: Sanding is not glamorous, but it is one of the biggest differences between a DIY-looking job and a clean professional finish.
Sanding is not just about making something feel smooth.
In painting, sanding does three major things:
- It removes roughness and surface defects.
- It dulls glossy coatings so new paint can bond.
- It creates a more uniform surface for primer and finish paint.
That last part matters more than people think.
Paint does not hide everything. In many cases, paint makes flaws more obvious. A fresh coat can highlight drywall ridges, rough patches, old brush marks, chipped trim, uneven caulk, cabinet grain, or sanding scratches.
That is why Lightmen Painting puts so much emphasis on prep-first painting process. The final coat gets the applause, but the prep work does the heavy lifting.
Why Sanding Is Essential Before Painting
Sanding helps prevent common paint problems like:
- Peeling
- Chipping
- Flaking
- Cracking
- Blistering
- Poor adhesion
- Uneven sheen
- Rough texture
- Visible patch edges
- Roller marks showing through
- Brush marks being amplified
- Paint looking “cheap” even when the product is good
A lot of paint failure starts before the paint ever goes on.
If a surface is glossy, dirty, damaged, or uneven, paint has a harder time bonding properly. That is especially true for trim, cabinets, doors, previously painted surfaces, and exterior siding.
For exterior projects, poor sanding and prep can lead to early peeling, especially where old paint is already loose. If your home already has peeling, bubbling, or cracking paint, it may be worth reviewing Lightmen Painting’s paint failure inspection resources before repainting over the same problem.
Painting over failure is not a repair. It is a cover-up with a countdown timer.
Things to Know
- Sanding improves paint adhesion, but only if the surface is also clean and dust-free.
- Wood, drywall, metal, cabinets, trim, and exterior siding all require different sanding techniques.
- Glossy surfaces usually need sanding or deglossing before repainting.
- Drywall should be sanded gently so the patch blends without damaging the surrounding wall.
- Cabinets need degreasing before sanding, not after.
- Dark colors and shiny finishes reveal surface flaws more than flat, light-colored paint.
- If your home was built before 1978, do not sand old paint without considering lead-safe practices.
- Prep quality usually affects durability more than the paint brand alone.
What Sanding Actually Does to a Surface
Sanding changes the surface in ways that help paint perform better.It can:
- Smooth rough material
- Remove loose paint edges
- Feather chipped areas
- Dull glossy finishes
- Level patching compound
- Remove raised grain on wood
- Clean up old brush marks
- Reduce minor imperfections
- Help primer grip better
- Improve the final appearance
The goal is not always to sand everything down to bare material. That is a common mistake.
The goal is to create the right surface profile for the next coating.
Sometimes that means light scuff sanding.
Sometimes that means feather sanding peeling edges.
Sometimes that means leveling drywall patches.
Sometimes that means aggressively removing failing coating.
Sometimes that means not sanding too hard because the surface is delicate.
Good sanding is not just effort. It is judgment.
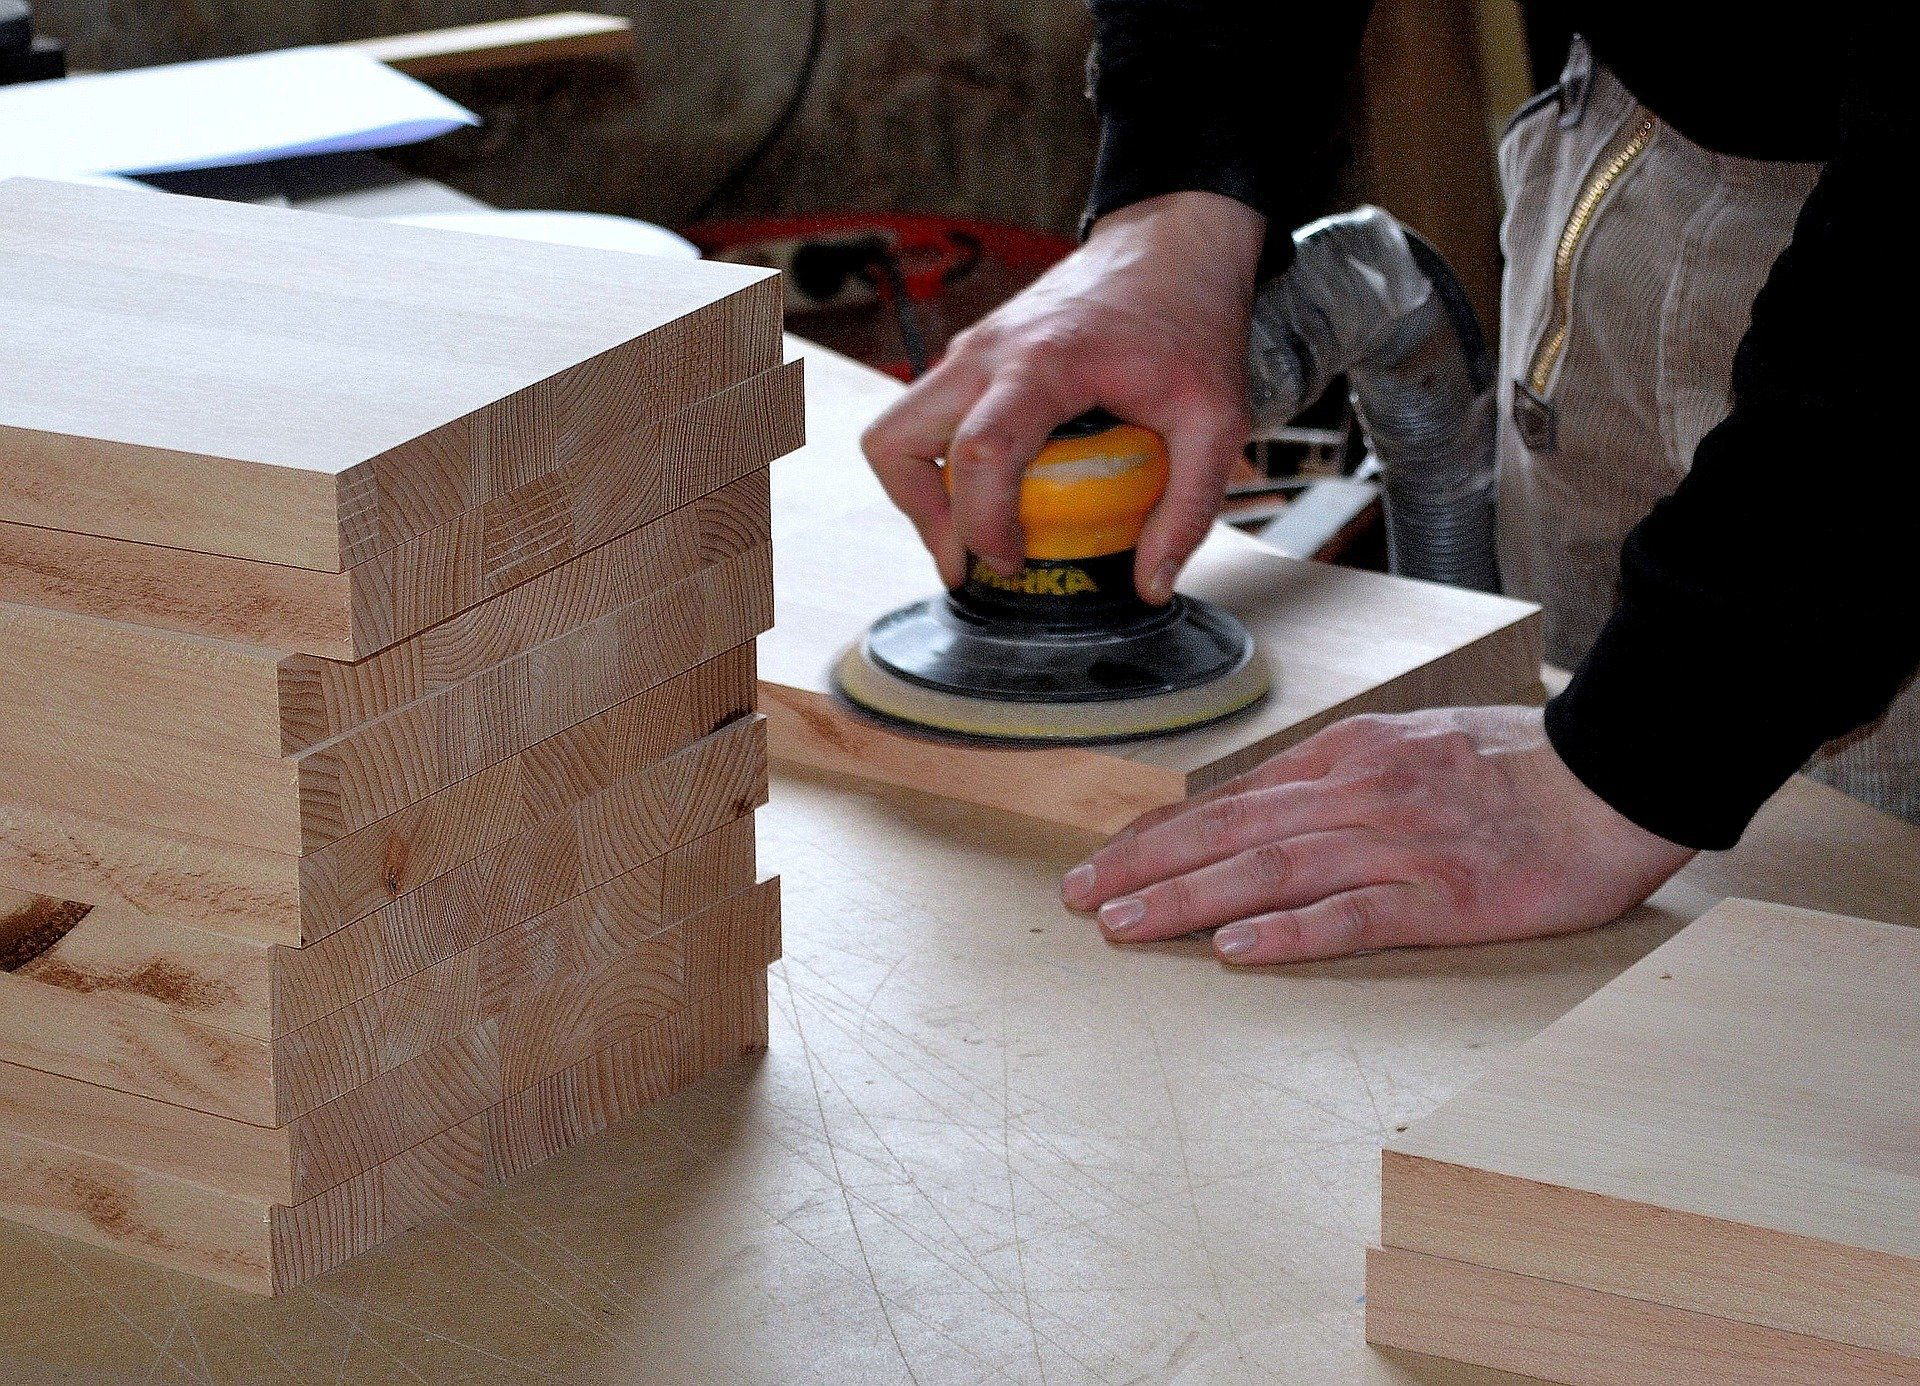
Sanding Wood Before Painting
Wood is one of the most common surfaces that needs sanding before painting.
This includes:
- Trim
- Doors
- Cabinets
- Built-ins
- Shelving
- Fascia
- Exterior wood siding
- Railings
- Furniture
- Window casings
Wood has grain, texture, pores, and movement. Sanding helps smooth the surface, remove imperfections, and prepare it for primer or paint.
Best Sandpaper Grits for Wood
For rough wood or old coatings:
- Start around 60–80 grit if heavy material removal is needed.
- Move to 120 grit for general smoothing.
- Finish with 180–220 grit for a smoother paint-ready surface.
For previously painted trim or doors:
- 120–180 grit is often enough for scuff sanding.
- 220 grit can be used for final smoothing between coats.
For cabinets:
- Avoid overly aggressive sanding unless the finish needs major removal.
- Cabinets usually need degreasing first, then controlled sanding or deglossing.
- The goal is adhesion and smoothness, not destroying the surface.
For cabinet work, sanding is only one piece of the system. Cleaning, degreasing, primer selection, dust control, and cure time all matter. If you are thinking about repainting kitchen cabinets, start with Lightmen Painting’s cabinet painting and refinishing services in Portland.
Cabinets punish lazy prep. They are basically the final boss of “I thought this would be easy.”
Sanding Drywall Before Painting
Drywall sanding is different from wood sanding.
With drywall, the goal is usually to smooth joint compound, feather patch edges, and create a seamless transition between repaired areas and the surrounding wall.
Drywall is softer and easier to damage, so aggressive sanding can cause problems fast.
Best Sandpaper Grits for Drywall
For drywall patches and joint compound:
- 150 grit works for initial smoothing.
- 180–220 grit works well for final feathering.
- Sanding sponges can help on corners and small repairs.
- Pole sanders can help with larger wall areas.
The goal is smooth, not gouged.After sanding drywall, always remove dust before priming or painting. Drywall dust left on the wall can interfere with adhesion and create a chalky, weak surface.
For larger interior painting projects, especially with wall repairs, it helps to have a professional evaluate the patching, texture, primer needs, and paint finish. Lightmen Painting’s interior painting services include the kind of surface prep that makes walls look finished instead of “patched in a hurry before company came over.”
Sanding Metal Before Painting
Metal needs a different approach because the main concerns are adhesion, oxidation, rust, and surface scratches.
Metal surfaces may include:
- Railings
- Handrails
- Doors
- Frames
- Hardware
- Exterior metal details
- Commercial fixtures
- Utility areas
Before painting metal, remove rust, oxidation, loose coating, oils, and contaminants. Sanding helps create a surface that primer and paint can bond to.
Best Sandpaper Grits for Metal
For general metal prep:
- 120 grit can remove light oxidation or roughness.
- 180–220 grit can smooth the surface.
- 320–400 grit may be used for finer finish preparation.
For rust:
- Remove rust thoroughly before coating.
- Use the correct primer for the metal and exposure.
- Do not paint over active rust and expect the paint to save you.
Paint over rust is like putting a nice shirt over a bad sunburn. The problem is still there, and it is going to make itself known.
Metal prep matters especially in commercial or high-use environments. For railings, doors, frames, and commercial spaces, Lightmen Painting’s commercial painting services in Portland can help match the prep and coating system to the surface.
Sanding Trim and Doors Before Painting
Trim and doors often need sanding because they are usually coated in harder, glossier finishes.
Glossy surfaces can resist new paint. Without sanding or deglossing, new paint may scratch, peel, or fail to bond well.
Common trim and door prep includes:
- Cleaning
- Deglossing
- Sanding
- Caulking gaps
- Filling nail holes
- Spot priming bare areas
- Sanding between coats if needed
For trim, sanding also helps remove old brush marks, drips, chips, and rough edges.
If the goal is a sharp, high-end interior finish, trim prep matters as much as wall painting. Clean walls with beat-up trim still look tired.
Sanding Cabinets Before Painting
Cabinet sanding deserves its own section because cabinets are not just small walls with doors.
Cabinets deal with:
- Grease
- Hand oils
- Steam
- Cleaning chemicals
- Food residue
- Repeated touching
- Door movement
- Drawer friction
- Hardware wear
Before sanding cabinets, they should usually be cleaned and degreased first. Sanding grease into the surface is a fantastic way to create adhesion problems with extra steps.
A good cabinet prep process may include:
- Removing doors and drawers
- Labeling parts
- Degreasing
- Sanding or deglossing
- Dust removal
- Bonding primer
- Fine sanding between coats
- Controlled application
- Proper cure time
Cabinet painting is one of the biggest areas where homeowners underestimate prep. If the sanding, primer, and application are wrong, the finish can chip, peel, or look rough.
For Portland homeowners who want a smoother, longer-lasting cabinet finish, professional cabinet refinishing is usually worth considering.
Sanding Exterior Surfaces Before Painting
Exterior sanding is about appearance and protection.
On exterior homes, sanding is often used to:
- Feather peeling paint
- Smooth scraped edges
- Remove loose coating
- Prep exposed wood
- Improve primer bonding
- Smooth rough trim
- Reduce old paint ridges
- Prepare patched areas
Portland-area homes deal with moisture, shade, UV exposure, and seasonal weather changes. If exterior paint is already failing, prep needs to be handled carefully before repainting.
Exterior sanding may be needed on:
- Wood siding
- Cedar siding
- Fascia
- Trim
- Doors
- Railings
- Window trim
- Peeling areas
- Previous paint failure spots
A proper Portland exterior painting service should include inspection, washing, scraping, sanding, priming, caulking, masking, and coating selection based on the actual condition of the home.
Just slapping paint over peeling siding is not exterior painting. It is exterior wishful thinking.
How Much Sanding Is Enough?
This is where people get confused.You do not always need to sand a surface until it looks brand new. You need to sand enough to prepare it for the next step.
Enough sanding means:
- Loose paint is removed.
- Gloss is dulled.
- Edges are feathered.
- Patches are smooth.
- Dust is removed.
- The surface feels consistent.
- Primer or paint can bond properly.
Too little sanding can cause adhesion problems.
Too much sanding can damage the surface, expose material unnecessarily, create uneven texture, or waste time.
The right amount depends on:
- Surface type
- Existing coating
- Paint condition
- Desired finish
- Primer choice
- Topcoat choice
- Interior vs. exterior exposure
- Whether the surface is high-use or low-use
This is why painting is not just “prep and paint.” It is diagnosis, prep, product, and application.
Common Sanding Mistakes Homeowners Make
Sanding looks simple until you see what can go wrong.
Common mistakes include:
- Using the wrong grit
- Skipping cleaning before sanding
- Sanding too aggressively
- Not sanding glossy surfaces
- Leaving dust behind
- Painting over loose paint
- Not feathering patch edges
- Using orbital sanders carelessly
- Skipping primer after sanding bare surfaces
- Sanding lead-painted surfaces without proper precautions
- Assuming “smooth to the hand” means paint-ready
That last one matters. A surface can feel smooth but still be dusty, glossy, contaminated, or poorly bonded.
Important Lead Paint Warning
Older homes may have lead-based paint. If your home was built before 1978, sanding, scraping, or disturbing old paint can create health risks if lead-safe practices are not followed.
Do not dry sand old unknown paint without understanding the risks.
For older Portland homes, this is a serious consideration. Proper containment, testing, and lead-safe procedures may be required depending on the project.
This is one of those moments where YouTube confidence is not enough. Lead dust is not a character-building experience.
Mid-Article CTA
Planning an interior repaint, exterior repaint, cabinet project, or trim refresh in the Portland metro area? Lightmen Painting can help identify what level of sanding and prep your surfaces actually need before paint goes on. Start with a clean scope, proper prep, and a finish built to last. You can request a painting estimate or call 503-389-5758.
Should You Sand Between Coats?
Sometimes, yes.
Sanding between coats can help remove dust nibs, brush marks, roller texture, raised grain, or minor imperfections.
This is especially common on:
- Cabinets
- Trim
- Doors
- Built-ins
- Fine-finish surfaces
- Furniture
- High-end enamel work
For regular wall painting, sanding between every coat is not always necessary unless the surface has visible flaws, debris, or texture issues.
When sanding between coats, use fine grit and a light touch. The goal is not to remove the paint. The goal is to smooth the surface.
In My Opinion
In my opinion, sanding is one of the clearest dividing lines between a paint job that looks professional and one that looks like someone “had a free weekend.”
Most people do not want to sand. I get it. Sanding is dusty, slow, repetitive, and deeply unsexy. Nobody walks into a room and says, “Wow, I love the sanding.” They notice the smooth finish, clean trim, sharp cabinet doors, and lack of weird bumps and ridges.
But that finish came from prep.
The biggest mistake homeowners make is assuming paint will cover problems. It usually does the opposite. Paint highlights bad patches, rough sanding, glossy spots, and skipped prep like a spotlight on bad karaoke.
So yes, sanding matters. Not because it is fun. Because it is the price of admission for a finish that does not look like regret.
Sanding and Primer: Why They Work Together
Sanding and primer are best friends. Annoying, dusty friends, but still important.
Sanding prepares the surface mechanically. Primer prepares the surface chemically and visually.
Primer can help:
- Seal porous surfaces
- Block stains
- Improve adhesion
- Even out absorption
- Cover bare wood or drywall
- Support color changes
- Create a better base for finish paint
After sanding bare wood, patched drywall, stained areas, or questionable surfaces, primer may be needed before painting.
Skipping primer after sanding can create flashing, uneven sheen, poor coverage, or weak adhesion.
Sanding and Paint Sheen
The shinier the finish, the more surface flaws tend to show.
Flat and matte paints hide more imperfections. Satin, semi-gloss, and gloss finishes reflect more light, which can expose rough sanding, poor patching, old brush marks, and uneven surfaces.
That is why sanding matters more on:
- Trim
- Doors
- Cabinets
- Bathrooms
- Kitchens
- Accent walls
- Dark colors
- Glossy finishes
- High-light areas
If you are using a darker color or higher sheen, surface prep needs to be tighter.
Paint sheen has no mercy. It will tell on you.
DIY Sanding vs. Professional Prep
DIY sanding can work for small projects if you understand the surface, use the right grit, control dust, and prep correctly.
DIY sanding is reasonable for:
- Small wall patches
- Minor trim touch-ups
- Simple furniture projects
- Light scuff sanding
- Small rooms
- Low-risk surfaces
Professional sanding and prep are usually smarter for:
- Cabinets
- Full interiors
- Exterior repaints
- Peeling paint
- Older homes
- High-gloss trim
- Commercial spaces
- Large drywall repairs
- High-visibility walls
- Paint failure situations
- Lead paint concerns
The more visible, expensive, or failure-prone the surface is, the more prep matters.
If you want to see how prep fits into the broader project, review Lightmen Painting’s painting process before starting.
Do You Have Questions? Give Us A Call With Any & All! 503-389-5758
-
People Also Ask:
Why is sanding important before painting?
Sanding is important because it smooths the surface, removes imperfections, dulls glossy finishes, and helps paint or primer bond better. Without sanding, paint may peel, chip, or show surface flaws more easily.
Do I always need to sand before painting?
Not always, but many surfaces benefit from sanding. Glossy trim, cabinets, doors, patched drywall, peeling paint, rough wood, and previously coated surfaces usually need some level of sanding or deglossing before repainting.
What grit sandpaper should I use before painting?
It depends on the surface. Rough wood may start around 60–80 grit, general smoothing often uses 120–180 grit, and final smoothing or drywall work commonly uses 180–220 grit. Fine-finish surfaces may need even lighter sanding between coats.
Should I sand walls before painting?
Walls do not always need full sanding, but patched areas, rough spots, old drips, texture problems, and glossy surfaces should be sanded before painting. Always remove dust before primer or paint.
Do cabinets need sanding before painting?
Yes, most cabinets need cleaning, degreasing, sanding or deglossing, and the right primer before painting. Cabinets are high-touch surfaces, so prep matters heavily. For professional results, review cabinet painting and refinishing in Portland.
Can sanding fix peeling exterior paint?
Sanding can help feather edges and smooth scraped areas, but peeling paint needs proper removal, diagnosis, priming, and repainting. If the cause is moisture or coating failure, sanding alone will not fix it.
Definitions
- Sanding: The process of using abrasive paper, pads, screens, or tools to smooth, dull, level, or prepare a surface before painting or finishing.
- Surface Preparation: The cleaning, sanding, scraping, patching, priming, caulking, and repair work completed before paint is applied.
- Paint Adhesion: The ability of paint or primer to bond securely to the surface underneath it.
- Grit: The roughness level of sandpaper. Lower numbers are more aggressive. Higher numbers are finer and smoother.
- Coarse Grit: Rough sandpaper, often used for heavy material removal, old coatings, or rough surfaces.
- Fine Grit: Smoother sandpaper used for final prep, between-coat sanding, drywall smoothing, and finish work.
- Scuff Sanding: Light sanding used to dull a glossy surface so primer or paint can bond better.
- Feather Sanding: Sanding the edge of chipped or peeling paint so the transition between bare surface and existing paint is smoother.
- Deglossing: The process of dulling a shiny surface using sanding, liquid deglosser, or both.
- Joint Compound: A drywall material used to cover seams, fasteners, and repairs before sanding and painting.
- Drywall Dust: Fine dust created when sanding joint compound. It must be removed before painting to avoid adhesion and finish problems.
- Primer: A preparatory coating used before paint to seal, bond, block stains, or create a more uniform surface.
- Substrate: The material being painted, such as drywall, wood, metal, siding, trim, cabinets, or masonry.
- Blocking: When painted surfaces stick to each other, often on doors, windows, shelves, or cabinets.
- Lead-Safe Practices: Special procedures used when disturbing old paint that may contain lead, especially in homes built before 1978.
-
If you are planning a painting project in the Portland metro area, do not let the final finish depend on rushed prep. Sanding, cleaning, priming, and surface repair are what separate a paint job that lasts from one that starts failing before the invoice stops hurting.
Lightmen Painting can help with interior painting, exterior painting, cabinet refinishing, trim painting, drywall prep, paint failure review, and full repaint planning.You can request an estimate from Lightmen Painting, schedule through the Lightmen Painting calendar, or call 503-389-5758.CCB# 228370.
Lightmen Painting Serving: Portland, Tigard, Lake Oswego, Tualatin, West Linn, Milwaukie, Sherwood, Happy Valley, Oregon City, Beaverton, Hillsboro, Gresham