The Art of Whitewashing: Timeless Techniques for Your Home

Key Features:
- Aesthetic Effects: Adds rustic charm and texture, creating a vintage, farmhouse-style appearance.
- Materials Needed: Traditional whitewashing materials include lime, salt, and water; modern alternatives include pre-mixed whitewashing paint.
- Application Process: Involves cleaning the surface, mixing the whitewash, and applying it in thin, even layers with a brush, sponge, or rag.
Whitewashing: A Timeless Technique for Brightening and Refreshing Spaces
Introduction
Whitewashing is a painting technique that has been used for centuries to brighten and refresh walls, furniture, and even exterior surfaces. Its origins can be traced back to ancient times when it was used to sanitize and beautify buildings. Over the years, whitewashing has evolved from a practical method to a popular decorative technique in home décor, adding a touch of rustic charm and texture to various surfaces.
What is Whitewashing?
Whitewashing is a simple, yet effective technique that involves applying a watered-down paint or lime mixture to a surface to create a translucent, washed-out effect. Unlike traditional painting, which aims for full coverage and vibrant color, whitewashing allows the underlying material to show through, resulting in a softer, more weathered look.
- Aesthetic Effects: Whitewashing adds a rustic charm and texture to surfaces. It can create a vintage, farmhouse-style appearance, making it a popular choice for those looking to add character and warmth to their homes.
Materials Needed for Whitewashing
To achieve a successful whitewashed look, you'll need the following materials:
Traditional Whitewashing Materials
- Lime: The key ingredient in traditional whitewashing, providing the distinctive white color and disinfectant properties.
- Salt: Added to the lime mixture to enhance the binding properties.
- Water: Used to dilute the lime and salt mixture to the desired consistency.
- Brushes: Sturdy brushes for applying the whitewash to the surface.
Modern Alternatives
For those looking for a more straightforward approach or different effects, modern materials and additives are available:
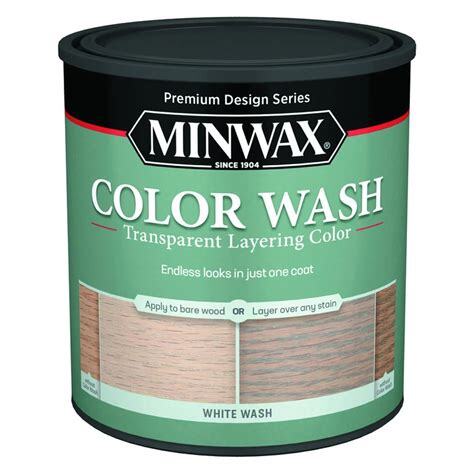
- Whitewashing Paint: Pre-mixed whitewashing paint products simplify the process and ensure consistent results.
- Additives: Various additives can be mixed with paint to achieve the whitewashed effect, such as diluted latex paint or specialized whitewashing solutions.
How to Whitewash
Preparation
- Clean the Surface: Ensure the surface is clean and free of dust, dirt, and grease.
- Protect Surroundings: Use drop cloths and painter’s tape to protect areas you don't want to whitewash.
Mixing the Whitewash
- Traditional Mix: Combine 5 parts water to 1 part lime and 1 part salt. Stir until the mixture is smooth.
- Modern Mix: If using pre-mixed whitewashing paint, follow the manufacturer's instructions. For diluted latex paint, mix 1 part water to 2 parts paint.
Application
- Apply the Whitewash: Use a brush to apply the whitewash in thin, even layers. Work in small sections to ensure consistent coverage.
- Wipe Off Excess: Immediately after applying, use a rag or sponge to wipe off the excess, allowing the underlying material to show through.
- Repeat as Needed: Apply additional layers for a more opaque look, letting each layer dry before applying the next.
Preparing Your Surface for Whitewashing
Steps to Prepare Different Surfaces for Whitewashing
Wood, Brick, and Plaster Surfaces
Proper preparation is crucial to ensure the whitewash adheres well and achieves the desired aesthetic outcome. Here's how to prepare different surfaces:Cleaning
- Importance of Clean Surfaces: A clean surface is essential for proper whitewash adhesion. Dirt, dust, grease, and previous coatings can prevent the whitewash from penetrating and adhering correctly.
- Cleaning Methods:
- Wood: Use a mild detergent and water to scrub the surface. Rinse thoroughly and let it dry completely.
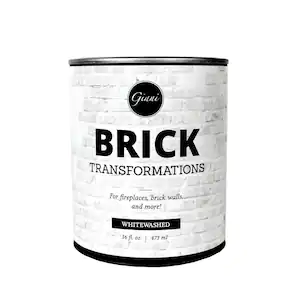
- Brick: Use a wire brush or pressure washer to remove dirt, loose mortar, and debris. Allow the brick to dry thoroughly.
- Plaster: Wipe down with a damp cloth to remove dust and grime. Ensure the surface is dry before applying whitewash.
Repairs
- Fixing Imperfections: Address any imperfections that might affect the finish. Cracks, holes, and uneven areas should be repaired to create a smooth surface.
- Repair Methods:
- Wood: Fill cracks and holes with wood filler. Sand smooth once dry.
- Brick: Repair damaged mortar with a suitable mortar repair product.
- Plaster: Use a patching compound to fill any holes or cracks. Sand smooth when dry.
Priming
- Deciding When to Prime: Priming may be necessary depending on the material and desired finish.
- Priming Guidelines:
- Wood: Prime if the wood is untreated or if you want a more uniform finish.
- Brick: Priming is usually not necessary for brick unless it has been previously painted or sealed.
- Plaster: Prime if the plaster is new or if you want to achieve a more consistent whitewash finish.
The Whitewashing Process
Detailed Step-by-Step Guide on How to Apply Whitewash
Mixing the Whitewash
- Traditional Mix: Combine 5 parts water to 1 part lime and 1 part salt. Stir until the mixture is smooth.
- Modern Mix: If using pre-mixed whitewashing paint, follow the manufacturer's instructions. For diluted latex paint, mix 1 part water to 2 parts paint.
Application Techniques
- Brush Strokes: Use long, even strokes to apply the whitewash. This technique works well for wood surfaces.
- Sponging: Dip a sponge into the whitewash mixture and dab onto the surface for a textured look. This method is ideal for brick.
- Ragging: Use a rag to apply the whitewash in a circular motion, creating a soft, diffused effect. This technique is suitable for plaster.
Layers
- Applying Multiple Layers: For added depth and durability, apply multiple layers of whitewash.
- First Layer: Apply a thin layer and let it dry completely.
- Subsequent Layers: Apply additional layers as needed, allowing each layer to dry before applying the next. This builds up the whitewash and enhances its appearance.
In Our Experience:
"When it comes to whitewashing, we've found that preparation is key to achieving that perfect rustic charm. I remember a project where we were whitewashing the interior of an old farmhouse in Milwaukie. The walls were a mix of old wood and plaster, and they needed a lot of cleaning and repair work. We spent a good amount of time scrubbing down the surfaces and filling in cracks. It was a lot of effort upfront, but the results were stunning. The whitewash brought out the character of the wood grain and added a warm, inviting feel to the space. One thing I've learned is that taking the time to properly prepare your surfaces can make all the difference in the final look and longevity of the whitewash."
Interior vs. Exterior Whitewashing
Discussion on the Differences Between Interior and Exterior Whitewashing
Material Choices and Protective Measures for Weather ElementsWhen it comes to whitewashing, the techniques and materials used can differ significantly between interior and exterior applications. Here’s a closer look at the considerations for each:Exterior Considerations
- Weatherproofing: Exterior whitewashing must withstand harsh weather conditions, including rain, sun, wind, and temperature fluctuations.
- Protective Coatings: Apply a clear, weather-resistant sealant over the whitewash to protect it from moisture and UV damage.
- Durable Materials: Use lime-based whitewash for exterior surfaces as it has natural antibacterial and antifungal properties, making it more durable against outdoor elements.
- Application Timing: Choose a dry, mild day to apply whitewash, ensuring it has enough time to cure properly before being exposed to rain or intense sunlight.
Interior Tips
- Controlled Environment: Interior whitewashing benefits from a controlled environment, reducing the need for extreme protective measures.
- Consistency and Finish: For a more refined finish, use diluted latex paint or whitewashing paint designed for interiors, which can provide a smoother and more consistent look.
- Long-Lasting Application: Apply a primer if the surface is particularly porous or uneven, and consider using a matte or satin finish sealant to protect the whitewash without adding too much shine.
- Decorative Techniques: Experiment with different application methods like ragging or sponging to create unique textures and patterns on interior walls or furniture.
Design Ideas with Whitewashing
Creative Ideas and Inspiration for Using Whitewash in Home Décor
Furniture
- Transforming Old Furniture: Give old or outdated furniture a new lease on life with a whitewashed finish.
- Rustic Charm: Sand down an old wooden table, apply whitewash, and then gently sand again to create a distressed, rustic look.
- Modern Farmhouse: Use whitewash on cabinets, dressers, and chairs to achieve a modern farmhouse aesthetic that pairs well with a variety of home décor styles.
Accent Walls
- Creating Focal Points: Use whitewash to create striking accent walls that add character and depth to any room.
- Living Room: Whitewash a single wall in the living room to draw attention to a fireplace, television, or piece of art.
- Bedroom: Create a calming, serene atmosphere by whitewashing the wall behind the bed, enhancing the room’s coziness and charm.
Garden Elements
- Outdoor Character: Extend the rustic charm of whitewashing to your garden and outdoor spaces.
- Pots and Planters: Whitewash terracotta pots and planters to give them a weathered, antique look that complements the greenery.
- Garden Furniture: Apply whitewash to wooden garden benches, tables, and chairs to create a cohesive, vintage-inspired outdoor seating area.
- Decorative Elements: Whitewash garden décor items like birdhouses, trellises, and garden signs to add a touch of rustic elegance to your garden.
Maintenance and Care for Whitewashed Surfaces
Tips on Maintaining Whitewashed Surfaces
Routine CleaningTo keep your whitewashed surfaces looking fresh and pristine, regular cleaning is essential:
- Recommended Cleaning Agents: Use mild soap and water to clean whitewashed surfaces. Avoid harsh chemicals that could strip away the whitewash.
- Cleaning Methods: Gently wipe down surfaces with a soft cloth or sponge. For tougher spots, a soft-bristle brush can help remove dirt without damaging the finish.
- Frequency: Regularly dust and clean surfaces to prevent dirt buildup. For exterior whitewashed surfaces, a gentle hose down every few months can help maintain cleanliness.
Touch-UpsWhitewashed surfaces may require occasional touch-ups to maintain their appearance:
- Identifying Wear: Look for areas where the whitewash has worn down or become stained. This is common in high-traffic areas or where the surface is exposed to the elements.
- Preparation: Clean the area to be touched up and ensure it is free from dust and debris. Lightly sand the edges of the worn area to create a smooth transition for the new whitewash.
- Application: Mix a small batch of the original whitewash formula. Apply with a brush or sponge, blending the new whitewash with the existing finish. Allow it to dry and apply additional layers if needed to match the surrounding area.
Troubleshooting Common Problems
Addressing Common Issues in Whitewashing Projects
Uneven Tones
- Causes: Uneven application, differing porosity of the substrate, or inadequate mixing of the whitewash can lead to uneven tones.
- Solution: Ensure thorough mixing of the whitewash before application. Apply thin, even layers and blend as you go. If uneven tones appear, lightly sand the area and reapply the whitewash.
Chipping
- Causes: Chipping can occur if the surface was not properly prepared or if the whitewash is too thick.
- Solution: Sand the chipped area to remove loose material. Reapply a thin layer of whitewash, ensuring the surface is clean and dry before starting.
Mold Prevention
- Causes: Mold can develop on whitewashed surfaces, especially in damp environments.
- Solution: Use a mold-resistant primer before applying whitewash, particularly on exterior surfaces or in high-humidity areas. Regular cleaning and ensuring proper ventilation can also help prevent mold growth. If mold appears, clean the area with a mixture of water and vinegar before reapplying the whitewash.
Conclusion
Whitewashing offers a timeless and charming way to enhance the natural beauty of surfaces in your home. Its rustic appeal and practical benefits make it an excellent choice for both interior and exterior applications. Whitewashing not only brightens spaces and adds character but also provides a cost-effective solution for refreshing walls, furniture, and outdoor elements. With the right materials, preparation, and techniques, you can achieve a beautiful, natural look that transforms your home.
Action
Ready to give your home a fresh, natural look with whitewashing? Try it yourself with a DIY kit, or for larger projects, consider hiring a professional to ensure perfect results. For more resources, guides, and professional services, visit Lightmen Painting or contact us for a consultation. Share your whitewashing projects and tips in the comments section below, and let's create beautiful spaces together!
Do You Have Questions? Give Us A Call With Any & All! 503-389-5758
-
People Also Ask:
What is whitewashing and how is it different from traditional painting?
Whitewashing is a technique that involves applying a watered-down paint or lime mixture to a surface to create a translucent, washed-out effect. Unlike traditional painting, which aims for full coverage and vibrant color, whitewashing allows the underlying material to show through, resulting in a softer, more weathered look. This method adds rustic charm and texture to surfaces, making it popular for creating vintage, farmhouse-style aesthetics.
What materials are needed for whitewashing, and what are some modern alternatives?
Traditional whitewashing materials include lime, salt, water, and sturdy brushes for application. Lime provides the distinctive white color and disinfectant properties, while salt enhances the binding properties. Modern alternatives include pre-mixed whitewashing paint and diluted latex paint, which simplify the process and ensure consistent results. Various additives can also be used to achieve the whitewashed effect.
How do you prepare different surfaces for whitewashing?
Proper preparation is crucial for ensuring the whitewash adheres well and achieves the desired aesthetic outcome. For wood surfaces, clean with mild detergent and water, then sand and fill any cracks or holes. For brick, use a wire brush or pressure washer to remove dirt and debris. For plaster, wipe down with a damp cloth and ensure it is dry. Depending on the material, priming might be necessary to achieve a consistent whitewash finish.
-
SUBSCRIBE TO OUR BLOG: Stay informed with the latest in Painting and DIY projects by subscribing to Lightmen Painting. Get insights, tips, and more delivered straight to your inbox. We would also love to know what you would like to read about, leave thoughts on where we should go next. Interests, Topics, Ideas, all are welcome.

If your in the Portland, Or. area and need advice or a free no obligation estimate call us at 503-389-5758 or email scheduling@lightmenpainting.com
Local Shout Out:
Celebrating Tualatin River Rafting: An Exciting Journey Through Nature
From the adventurous team at Lightmen Painting, we highlight Tualatin River Rafting, a thrilling way to experience the natural beauty and tranquility of the Tualatin River. Just as we strive for excellence in our painting projects, Tualatin River Rafting offers an exceptional outdoor adventure that combines excitement with the serenity of nature. This activity not only provides a unique perspective of the local ecosystem but also promotes outdoor recreation and family fun, reflecting our commitment to enhancing the enjoyment and beauty of our community spaces.
Thanks for stopping by Lightmen Daily! Stay tuned for more practical tips and expert advice on making your painting projects flawless, from wall to floor!
Definitions
- Whitewashing: A painting technique involving applying a watered-down paint or lime mixture to a surface to create a translucent, washed-out effect, allowing the underlying material to show through.
- Aesthetic Effects: Whitewashing adds rustic charm and texture to surfaces, creating a vintage, farmhouse-style appearance.
- Traditional Whitewashing Materials:
- Lime: The key ingredient in traditional whitewashing, providing distinctive white color and disinfectant properties.
- Salt: Enhances the binding properties of the lime mixture.
- Water: Used to dilute the lime and salt mixture to the desired consistency.
- Brushes: Sturdy brushes for applying the whitewash to the surface.
- Modern Alternatives:
- Whitewashing Paint: Pre-mixed whitewashing paint products that simplify the process and ensure consistent results.
- Additives: Various additives mixed with paint to achieve the whitewashed effect, such as diluted latex paint or specialized whitewashing solutions.
- Preparation:
- Clean the Surface: Ensure the surface is clean and free of dust, dirt, and grease.
- Protect Surroundings: Use drop cloths and painter’s tape to protect areas not being whitewashed.
- Mixing the Whitewash:
- Traditional Mix: Combine 5 parts water to 1 part lime and 1 part salt. Stir until the mixture is smooth.
- Modern Mix: Follow manufacturer’s instructions for pre-mixed whitewashing paint or mix 1 part water to 2 parts paint for diluted latex paint.
- Application:
- Apply the Whitewash: Use a brush to apply the whitewash in thin, even layers.
- Wipe Off Excess: Use a rag or sponge to wipe off excess whitewash, allowing the underlying material to show through.
- Repeat as Needed: Apply additional layers for a more opaque look, letting each layer dry before applying the next.
- Surface Preparation:
- Wood: Clean with mild detergent and water, fill cracks and holes with wood filler, and sand smooth once dry.
- Brick: Use a wire brush or pressure washer to remove dirt and debris, and repair damaged mortar.
- Plaster: Wipe down with a damp cloth, use a patching compound to fill holes or cracks, and sand smooth when dry.
- Priming:
- Wood: Prime if untreated or for a more uniform finish.
- Brick: Priming usually not necessary unless previously painted or sealed.
- Plaster: Prime if new or for a more consistent whitewash finish.
- Application Techniques:
- Brush Strokes: Long, even strokes, ideal for wood surfaces.
- Sponging: Dab with a sponge for a textured look, suitable for brick.
- Ragging: Circular motion with a rag for a soft, diffused effect, suitable for plaster.
- Exterior Considerations:
- Weatherproofing: Apply clear, weather-resistant sealant over the whitewash and use durable, lime-based whitewash for outdoor elements.
- Application Timing: Choose a dry, mild day to apply whitewash, ensuring proper curing.
- Interior Tips:
- Consistency and Finish: Use diluted latex paint or whitewashing paint designed for interiors for a smoother, more consistent look.
- Long-Lasting Application: Apply primer if surface is porous or uneven, and use matte or satin finish sealant for protection.
- Decorative Techniques: Experiment with ragging or sponging for unique textures and patterns.
- Design Ideas:
- Furniture: Sand, whitewash, and gently sand again for a distressed look on old furniture.
- Accent Walls: Whitewash a single wall to create focal points in living rooms or bedrooms.
- Garden Elements: Whitewash terracotta pots, garden furniture, and décor items for rustic outdoor charm.
- Maintenance:
- Routine Cleaning: Use mild soap and water, avoid harsh chemicals, and clean regularly.
- Touch-Ups: Clean, sand edges, and apply new whitewash to worn or stained areas.
- Troubleshooting:
- Uneven Tones: Ensure thorough mixing and apply thin, even layers.
- Chipping: Sand the area and reapply a thin layer of whitewash.
- Mold Prevention: Use mold-resistant primer, clean with water and vinegar, and reapply whitewash if needed.
Lightmen Painting Serving: Portland, Tigard, Lake Oswego, Tualatin, West Linn, Milwaukie, Sherwood, Happy Valley, Oregon City, Beaverton, Hillsboro, Gresham