New Construction Painting Checklist for Builders
Key Features
- Builder-Focused Finish Planning-This article helps builders organize primer, drywall readiness, trim prep, cabinet planning, exterior coating and final punch list expectations.
- Strong Project Handoff Support-The article positions painting as part of the builder’s final presentation, not just another task near the end.
- Clean Internal Link Flow-The page links up to professional resources, sideways to contractor coordination and commercial painting, and down into future builder-specific finish standards articles.
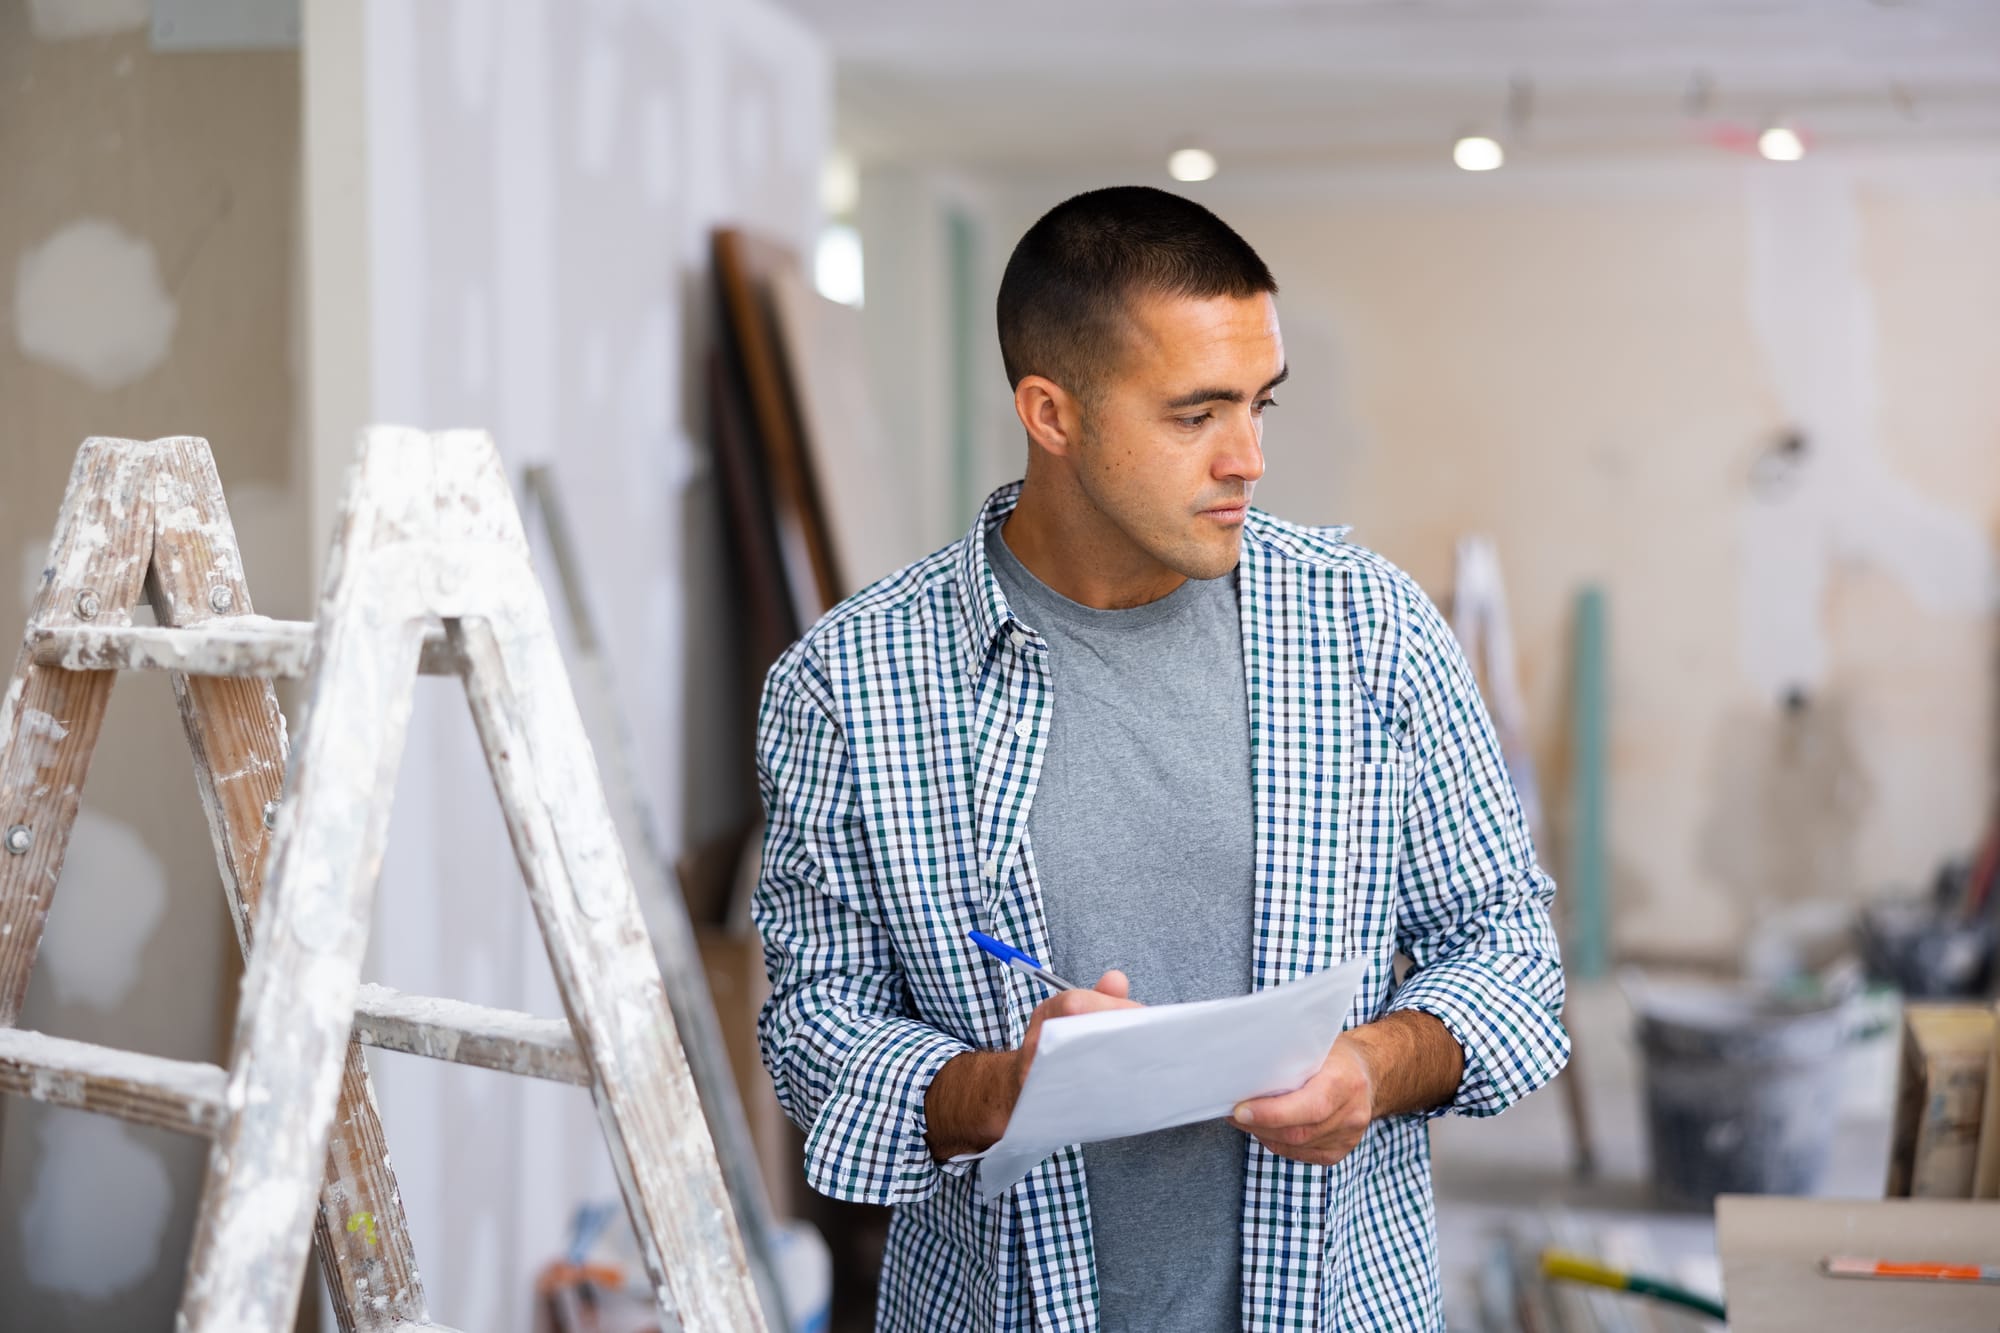
A strong new construction painting checklist helps builders protect the final presentation of the home or project.
Paint is one of the last major finish layers buyers, owners and project managers see. That makes it powerful. It also makes it dangerous. If drywall prep is weak, trim is rough, primer is skipped or final touch-ups are rushed, paint will show every problem like it has a personal grudge.
For Portland builders, small developers, remodel-build teams and construction managers, painting should not be treated as a quick end-of-project cleanup item. It needs clear scope, primer standards, surface prep expectations, product choices, finish schedules, punch list rules and final walkthrough coordination.
This guide is built for builders who want cleaner handoffs, fewer paint-related complaints and a more professional final product.
For builder-led projects that need cleaner finish execution, Lightmen Painting provides contractor painting partner support for new construction painting, remodel painting, cabinet refinishing, exterior painting and commercial finish work.
Things to Know
- Paint exposes earlier trade issues. Drywall flaws, trim gaps and poor sanding often become visible after painting.
- Primer matters on new construction. New drywall, raw wood, MDF and patched areas usually need proper primer before finish coats.
- Cabinets need separate scheduling. Cabinet painting requires different prep, coating and cure time than walls.
- Portland exterior work needs moisture awareness. Exterior new construction painting should account for substrate dryness, weather windows and proper priming.
- Internal punch lists prevent buyer drama. Builders should catch paint issues before the buyer walkthrough.
Why Builders Need a New Construction Painting Checklist
New construction painting is not just color on walls.It affects:
- Final presentation
- Buyer confidence
- Punch list volume
- Warranty calls
- Interior finish quality
- Exterior protection
- Trade coordination
- Builder reputation
- Project closeout speed
The problem is that paint often becomes the surface where everyone sees earlier mistakes.
Bad drywall finish? Shows after paint.
Poor trim prep? Shows after paint.
Dust left on surfaces? Shows after paint.
Wrong primer? Shows after paint.
Rushed touch-ups? Shows after paint.
That is why builders need a checklist before paint starts, not after the buyer walkthrough turns into an Easter egg hunt for defects.
Start With Drywall Readiness
Paint does not hide bad drywall.It highlights it.
Before priming or painting, check:
- Drywall finish level
- Texture consistency
- Sanding quality
- Corner bead condition
- Patch visibility
- Dust removal
- Drywall moisture concerns
- Nail or screw pops
- Joint visibility
- Surface contamination
- Repair areas
- Lighting-sensitive walls
If the drywall is not ready, painting just locks the problem in place.
What Builders Should Confirm Before Primer
Before primer goes on new drywall, confirm:
- Walls are sanded smooth
- Texture is consistent
- Dust has been removed
- Major defects are corrected
- Patches are feathered properly
- Surface is dry
- Lighting has been used to check visible walls
- High-visibility areas have been reviewed
High-visibility walls deserve extra attention.
That includes:
- Entry walls
- Stairwell walls
- Long hallway walls
- Great room walls
- Kitchen walls
- Walls with large windows
- Walls hit by natural side-lighting
Side-lighting is brutal. It will expose drywall flaws like it was hired by the buyer’s attorney.
Confirm Primer Requirements Before Finish Paint
Primer matters in new construction.
Skipping primer or using the wrong primer can lead to flashing, poor adhesion, uneven absorption and finish inconsistency.
Use primer when dealing with:
- New drywall
- Raw wood
- MDF
- Bare trim
- Patched areas
- Stains
- Previously coated problem surfaces
- Cabinet surfaces
- Exterior bare wood
- Masonry or specialty substrates
- Areas with uneven porosity
Why Primer Matters on New Drywall
New drywall absorbs paint differently than previously painted surfaces.
Primer helps:
- Seal the surface
- Improve adhesion
- Reduce flashing
- Create a uniform base
- Improve finish consistency
- Reduce uneven sheen
- Support better topcoat coverage
Skipping primer to save time usually creates more work later.
That is not efficiency. That is a callback wearing a fake mustache.
Separate Production Painting From Finish Painting
Many builders run into problems when every surface is treated like production work.
Production painting is about coverage and efficiency.
Finish painting is about final appearance.
Both matter, but they are not the same thing.
High-Visibility Areas Need More Finish Attention
Pay closer attention to:
- Entryways
- Stairwells
- Kitchens
- Great rooms
- Main living areas
- Primary bedrooms
- Bathrooms
- Built-ins
- Trim packages
- Interior doors
- Cabinets
- Exterior front elevations
These are the areas buyers and owners judge hardest.
A garage utility wall does not need the same finish focus as the kitchen island or entry trim. That is just common sense, which means someone will ignore it unless it is written down.
Builder Paint Standards Should Be Written
A builder paint standard should define:
- Primer requirements
- Wall products
- Ceiling products
- Trim products
- Door products
- Cabinet coatings
- Exterior coatings
- Sheens by surface
- Number of coats
- Touch-up standards
- Final walkthrough expectations
This keeps expectations clear across painters, supervisors, clients and punch list teams.
Check Trim Before Paint Starts
Trim should be reviewed before finish coats.
Look for:
- Nail holes
- Open miters
- Poor caulk lines
- Gaps
- Damaged edges
- Rough sanding
- Dust
- Uneven reveals
- Swollen MDF
- Damaged casing
- Poorly set baseboards
- Rough door jambs
Paint can make trim look finished, but it cannot make poor trim carpentry disappear.
Sadly, paint is not a wizard.
Trim Prep Checklist
Before painting trim, confirm:
- Nail holes are filled
- Caulk lines are clean
- Gaps are addressed
- Surfaces are sanded
- Dust is removed
- Raw wood or MDF is primed
- Damaged trim is repaired
- Door casing is inspected
- Baseboards are ready
- Finish expectations are clear
Trim is one of the biggest visual indicators of quality.
Fresh walls with rough trim still feel cheap.
Doors Need Their Own Paint Review
Interior doors get handled, bumped, leaned on, removed, reinstalled and touched constantly.
Before painting doors, check:
- Door surface condition
- Edge damage
- Hardware removal needs
- Hinge protection
- Spray or brush/roll method
- Door stacking/storage
- Drying time
- Reinstall timing
- Final touch-up needs
Doors should not be painted in a way that causes sticking, rough edges, hardware mess or obvious lap marks.
Door Painting Mistakes Builders Should Avoid
Avoid:
- Painting over dust
- Painting over damaged edges
- Leaving hardware on when it should be removed
- Reinstalling too early
- Using the wrong sheen
- Forgetting door tops and bottoms when specified
- Creating drips near panels
- Painting doors in poor lighting
- Skipping final edge inspection
Doors are high-contact surfaces. Treat them accordingly.
Cabinet and Built-In Painting Requires Separate Planning
Cabinet painting is not wall painting.Built-ins are not wall painting either.
They require different prep, products, application methods and cure expectations.
If cabinets are part of the build or remodel, the scope should connect directly to cabinet refinishing and cabinet painting.
Cabinet Painting May Include
- Door and drawer removal
- Labeling
- Degreasing
- Sanding
- Bonding primer
- Spray setup
- Masking
- Drying time
- Cure time
- Reinstallation
- Hardware coordination
- Final adjustment
- Touch-up protection
Cabinet coatings need time to cure.
Do not schedule cabinet painting like it is a hallway wall.
That is how timelines get weird and finishes get damaged.
Built-In Painting Checklist
For built-ins, confirm:
- Paint or stain direction
- Sheen
- Product system
- Spray or brush/roll method
- Interior surfaces included or excluded
- Shelving included or excluded
- Hardware removal
- Caulk lines
- Sanding expectations
- Drying and cure time
- Final protection
Built-ins are feature elements. They need feature-level planning.
Exterior New Construction Painting Needs Portland Climate Awareness
Portland exterior painting requires attention to moisture, substrate condition and timing.
New construction exteriors can still fail if prep and timing are weak.
Check:
- Siding dryness
- Primer requirements
- Caulk joints
- Trim condition
- Flashing areas
- End cuts
- Fascia
- Soffits
- Porch elements
- Exterior doors
- Railings
- Deck components
- Areas near landscaping
- Areas exposed to splash-back
- South and west sun exposure
- Shaded north-facing areas
Exterior paint is protection, not just color.
For bigger exterior projects, link the planning into commercial painting services or exterior painting support when the project scope fits.
Exterior Prep Checklist for Builders
Before exterior paint starts, confirm:
- Siding is dry enough for coating
- Bare wood is primed
- End cuts are sealed
- Failed caulk is corrected
- Gaps are reviewed
- Mildew or dirt is removed
- Trim repairs are complete
- Weather window is realistic
- Product system matches exposure
- Final color approvals are documented
Portland does not care about your schedule.
If the surface is too damp, the paint system is at risk.
Build a Paint Punch List System
Builder paint punch lists should not be random sticky notes, vague texts and photos with no location.
That gets messy fast.
Track:
- Room
- Surface
- Issue
- Responsible trade
- Photo
- Date identified
- Date corrected
- Final approval
Separate Paint Issues From Other Trade Issues
Not every finish issue is a paint issue.
Some issues come from:
- Drywall finish
- Trim gaps
- Texture problems
- Flooring damage
- Cabinet install damage
- Electrical cut-ins
- Plumbing repairs
- HVAC register changes
- Client damage
- Other trades working after paint
A good punch system identifies the actual cause instead of turning the painter into the official scapegoat with a brush.
Internal Punch Before Buyer Walkthrough
Before buyer or owner walkthrough, confirm:
- Walls are even
- Ceilings are clean
- Trim is finished
- Doors are painted properly
- Cabinets are complete
- Built-ins are finished
- Touch-ups do not flash
- Cut lines are clean
- Exterior front elevation looks sharp
- Hardware is clean
- Floors are protected
- Overspray is removed
- Paint cans are labeled for future touch-up
Do not let the buyer become your quality control system.
That is expensive and painful.
In Our Experience
In our experience, new construction painting succeeds when the builder treats paint like a finish system, not a final-week cleanup task. The best projects have clear prep standards, primer expectations, color approvals, trim review and an internal punch process. The rough projects usually start with assumptions. Assumptions are where finish quality goes to get punched in the teeth.
New Construction Painting Checklist for Builders
Use this before approving the painting phase.
Drywall and Wall Prep
- Drywall finish reviewed
- Texture is consistent
- Sanding is complete
- Dust is removed
- Patches are feathered
- Corner beads are clean
- Nail pops corrected
- Moisture concerns checked
- High-visibility walls reviewed
- Primer-ready condition confirmed
Primer
- New drywall primer selected
- Raw wood primer selected
- MDF primer selected
- Stain-blocking primer identified
- Exterior primer needs confirmed
- Patched areas primed
- Adhesion concerns reviewed
- Primer application approved before topcoat
Interior Finish Paint
- Wall colors approved
- Ceiling colors approved
- Trim colors approved
- Door colors approved
- Sheens selected
- Product lines confirmed
- Number of coats defined
- Accent areas documented
- Finish schedule saved
- Touch-up rules defined
Trim and Doors
- Nail holes filled
- Caulk lines clean
- Trim sanded
- Door edges checked
- Hardware plan confirmed
- Baseboards inspected
- Door frames inspected
- Final coat timing confirmed
- Protection plan in place
Cabinets and Built-Ins
- Cabinet scope confirmed
- Built-in scope confirmed
- Door/drawer removal planned
- Hardware removal planned
- Primer system selected
- Finish coating selected
- Spray setup planned
- Cure time included
- Reinstall timing coordinated
- Final touch-up expectations clear
Exterior Painting
- Siding condition reviewed
- Substrate dryness checked
- Bare wood primed
- End cuts sealed
- Caulk joints reviewed
- Trim repairs completed
- Weather window confirmed
- Exterior colors approved
- Product system selected
- Final elevation review planned
Final Walkthrough
- Internal punch list completed
- Paint issues documented
- Other trade issues separated
- Touch-ups completed
- Flashing checked
- Overspray checked
- Hardware cleaned
- Extra paint labeled
- Product records saved
- Buyer walkthrough ready
Common New Construction Painting Mistakes Builders Should Avoid
Painting Before Drywall Is Truly Ready
Rushing paint over poor drywall prep creates visible defects.
If the surface is not ready, the finish will not look ready.
Skipping Primer
Primer is not optional on new drywall, raw wood, MDF and many patched surfaces.
Skipping primer creates finish problems that are more expensive to fix later.
Letting Color Decisions Drag Too Long
Color delays create schedule delays.
Get selections approved before the painter is ready to start.
Treating Cabinets Like Regular Paint
Cabinets need a separate prep and coating system.
Wall paint logic does not belong on cabinet doors.
Not Protecting Finished Surfaces
Paint work near flooring, cabinets, counters, hardware and fixtures needs protection.
Poor protection makes the final project look sloppy.
Waiting Until the Buyer Walkthrough to Find Paint Issues
Internal punch first.Buyer walkthrough second.
That order saves everyone a headache.
What Should Builders Ask a Painting Partner?
Before hiring a painting partner for new construction or builder projects, ask:
- Do you understand builder timelines?
- Can you work from a written finish schedule?
- Do you identify drywall and trim issues before painting?
- What primer systems do you use?
- How do you handle touch-ups?
- Can you separate paint issues from other trade issues?
- Do you handle cabinets and built-ins?
- Can you support exterior painting in Portland weather?
- How do you document colors and sheens?
- Can you help with punch list closeout?
- What prep is included?
- What prep is excluded?
- How do you protect finished surfaces?
A builder painting partner should help the project close cleaner.
If they only show up to “paint stuff,” that is not enough.
How This Usually Works With Lightmen Painting
For builder-led projects, we focus on finish clarity.
First, we help define what surfaces are included.
Then we look at prep, primer needs, timing and finish expectations.
After that, we coordinate around the construction schedule so paint supports the final handoff instead of becoming a last-minute scramble.
The goal is simple: make the finished project look like the builder cared about the details.
That means clean walls, sharp trim, properly finished doors, clean cabinet work where applicable, exterior coating systems that make sense for Portland and a punch list process that does not make everyone miserable.
Need New Construction Painting Support in Portland?
Lightmen Painting helps Portland builders, small developers, remodelers and construction teams with:
- New construction painting
- Interior finish painting
- Exterior painting
- Trim and door painting
- Cabinet refinishing
- Built-in painting
- Builder punch list painting
- Primer and coating planning
- Final walkthrough support
- Contractor painting partner support
Start with contractor painting partner support, review painting coordination for general contractors or request a painting estimate.
Lightmen Painting
Licensed, bonded and insured
Portland, Oregon Metro Area
CCB# 228370
503-389-5758
People Also Ask
What should builders check before painting new construction?
Builders should check drywall finish, texture consistency, dust removal, trim readiness, primer requirements, moisture concerns, color approvals, sheen selections and final punch list expectations before painting starts.
Does new drywall need primer before painting?
Yes. New drywall should be primed before finish paint because primer helps seal the surface, improve adhesion, reduce flashing and create a more uniform finish.
Why do paint touch-ups show on new construction walls?
Touch-ups show when the color, sheen, surface texture or paint absorption does not match the surrounding area. Lighting, drywall patches and product differences can also make touch-ups visible.
Should cabinets be painted during the same phase as walls?
Cabinets should be planned separately from wall painting because they require different prep, primer, coatings, application methods and cure time.
How can builders reduce paint punch list issues?
Builders can reduce paint punch list issues by confirming drywall readiness, documenting color and sheen selections, clarifying prep responsibility, protecting finished surfaces and completing an internal punch list before buyer walkthroughs.
Definitions
- New construction painting checklist - A planning checklist used by builders to organize prep, primer, paint application and final walkthrough standards.
- Builder painting standards - Written expectations for painting quality, products, prep, sheens and touch-up rules on builder projects.
- Drywall primer - Primer used on new drywall to seal the surface and create a uniform base for finish paint.
- Finish painting - The final painting stage that creates the visible completed surface.
- Paint punch list - A list of paint-related corrections to complete before final approval or buyer walkthrough.
- Surface prep - Cleaning, sanding, caulking, patching, priming or repairing surfaces before paint.
- Sheen - The level of shine in paint, such as flat, matte, eggshell, satin or semi-gloss.
- Trim painting - Painting baseboards, casing, crown molding, doors and other finish carpentry elements.
- Cabinet refinishing - A detailed cabinet coating process involving cleaning, sanding, priming and finish coating.
- Exterior coating system - The full exterior paint process, including prep, primer, caulk and finish coats. Touch-up flashing, Visible color or sheen difference where touch-up paint does not blend with the surrounding surface.
- Final walkthrough - The final project review before buyer, client or owner approval.
A new construction painting checklist helps Portland builders, developers, remodelers and construction managers organize drywall readiness, primer requirements, trim prep, door painting, cabinet coating, exterior painting and final punch list expectations. Builder painting standards should include surface prep, drywall primer, raw wood primer, paint sheens, approved products, finish schedules, touch-up rules and final walkthrough procedures. New construction painting in Portland also requires exterior moisture awareness, proper caulking, substrate dryness and weather-sensitive scheduling. Lightmen Painting supports new construction painting, contractor painting partner support, interior finish painting, cabinet refinishing, exterior painting, commercial painting and builder punch list painting throughout the Portland metro area.